How to Organize your Refrigerator and Maximize Kitchen Efficiency
Right before the holiday season hits is a great time to get your kitchen in order.
It only makes sense that since you cleaned out your pantry (see my recent blog on pantry makeover), it’s now time to clean and organize your refrigerator for maximum efficiency in the kitchen.
So, if your refrigerator is a hot mess and you can’t find anything in it OR it takes you forever to find what you need, this post is for you.
It’s amazing how many of my clients tell me they actually like cooking now that their refrigerator is in order and has a process to it!
The worst thing in the world is having to move 12 things in your refrigerator to get to the one thing you need, so here some systems that work for my clients and me when it comes to having a user-friendly refrigerator.
Organize your Refrigerator in 9 Easy Steps
Step 1
Pull everything out of the refrigerator and clean the refrigerator thoroughly, throwing away any expired, moldy, or old items. (I suggest you do this quarterly for upkeep.)
Step 2
Line your shelves with plastic placemats or vinyl shelf liner to keep them in easy-to-clean mode. (This is a completely optional step.)
Pro tip: If you use shelf liner, remove the shelf and set it on the counter to warm up for a few minutes before application.
Step 3
Sort your refrigerator items into categories that make sense to you for easy use. Here are a few of mine:
- Milks
- Breads
- Vegetables & Fruits
- Sauces
- Condiments
- Meats
- Leftovers
Step 4
Measure your refrigerator for bin sizes. Every refrigerator is different. For example, mine is what’s called a counter-depth refrigerator, which means it doesn’t go too deep and can make for some challenging space issues.
Step 5
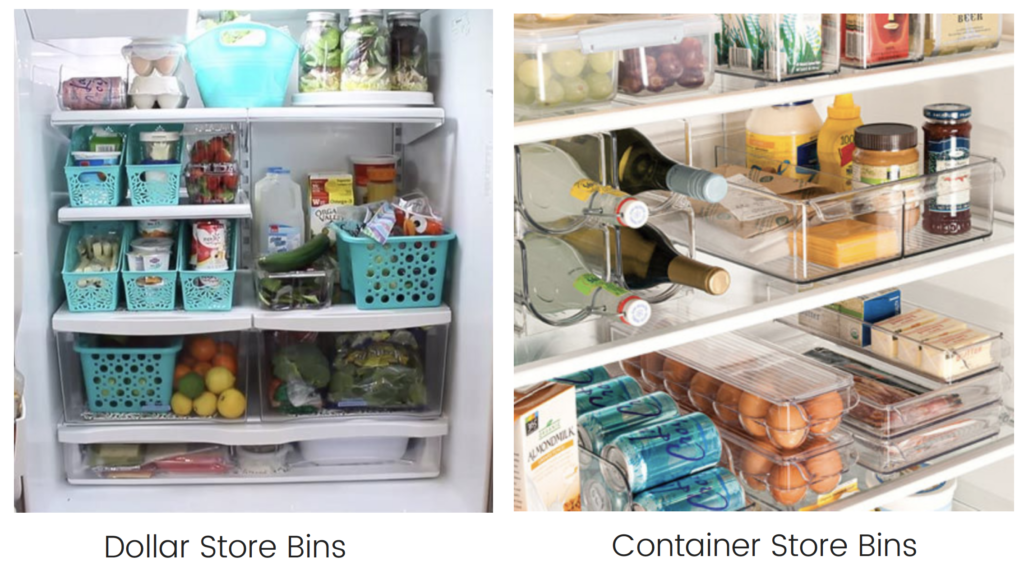
Purchase additional bins that work for your refrigerator size.
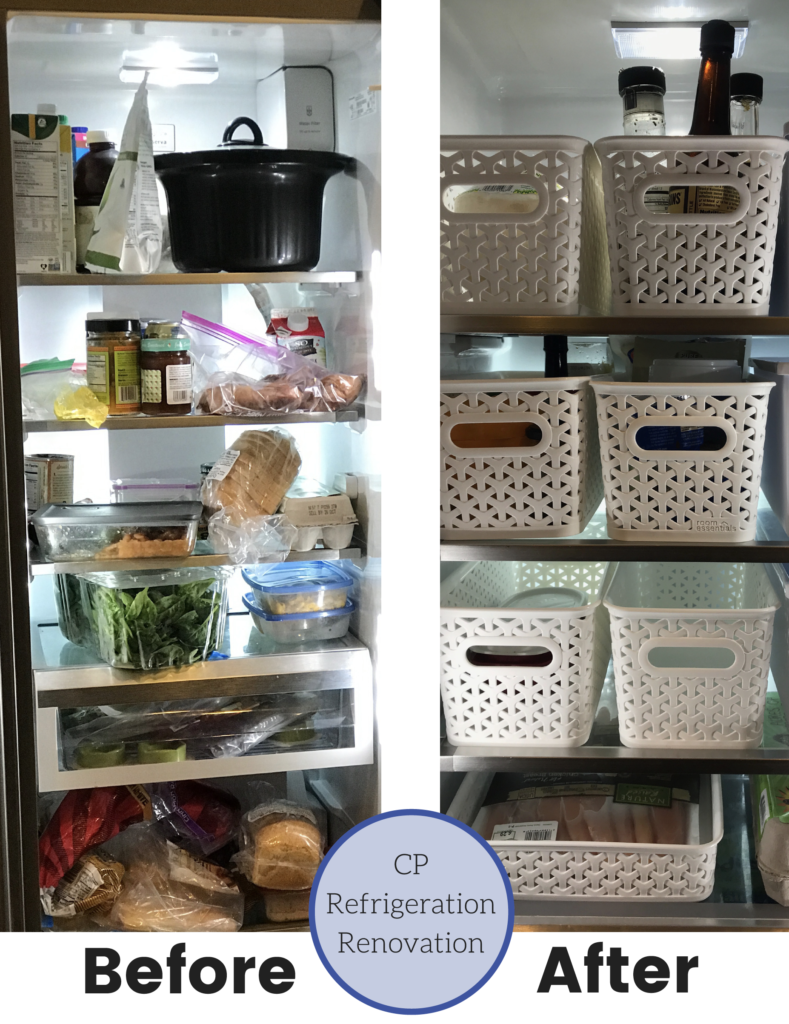
Using bins allows me to get twice as much in my refrigerator and makes it much more user-friendly because I just pull things out one bin at a time instead of moving multiple things to get to one item. Most of my clients prefer see-through bins for this, but mine are white. I personally don’t like being able to see everything in the refrigerator.
Step 6
Place meats in the meat drawer and fruits and veggies in the vegetable drawer.
Step 7
Place everything else in its designated bin and label the bins, if desired, before putting them back in the refrigerator. (Be sure to click at the bottom of this page for pics!)
I highly suggest keeping all bulk items in your pantry unless it’s something that needs to be refrigerated, like eggs. Having 12 boxes of coconut milk or chicken stock in the refrigerator only takes up valuable real estate. Pull these out of the pantry as needed.
Step 8
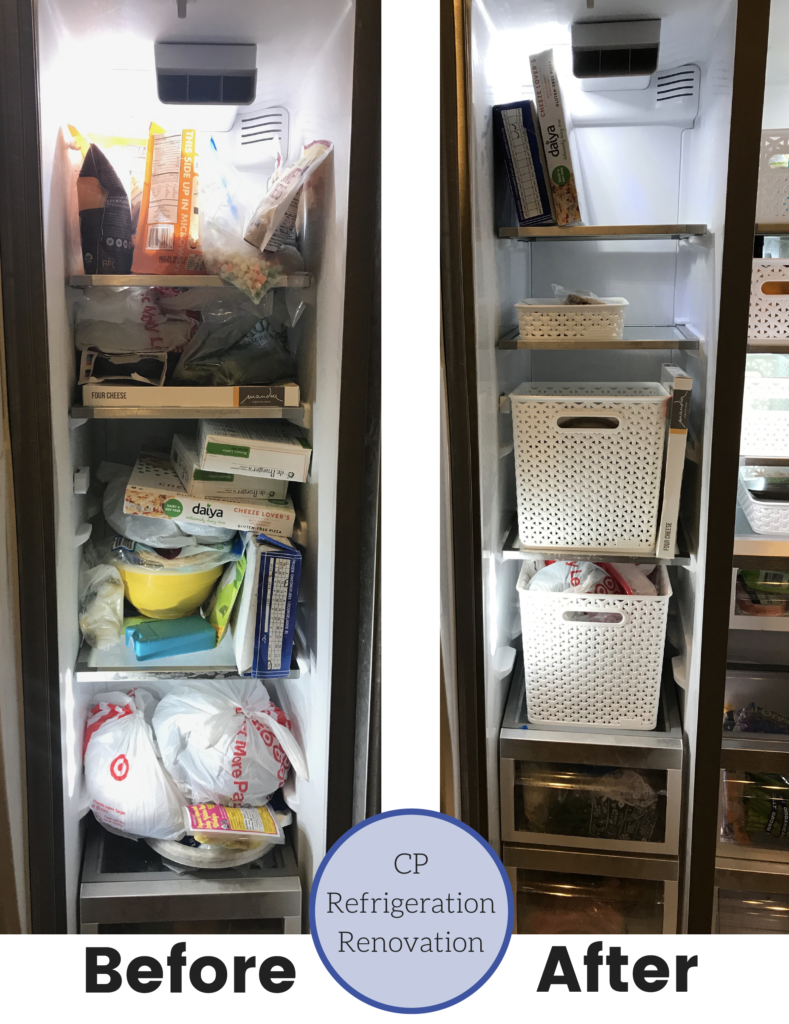
Follow the same process for your freezer. Here are a few freezer category ideas:
- Frozen Fruits
- Frozen Vegetables
- Quick Foods
- Frozen Meats
- Soup Bones
- Healthier Desserts
- Trash*
*I freeze anything that could stink up the trash before garbage day and then take it out of the freezer the morning of pickup.
Step 9
Access all your foods with ease and watch your friends ask you to help them organize their refrigerators!
I’m not saying that organizing your refrigerator will solve all of your nutrition and cooking challenges, but I have seen it work wonders for my clients who commit to it.
Oh, one last thing. I can’t stand it when you open your refrigerator door and hear a bunch of bottles clanking. If you are like me in this way, you can put your breads and cartons in the door trays and put all your condiment and sauce bottles in the bins.
Next Step
Schedule a day this week when you are excited to take on your own Refrigeration Renovation! Remember – the only thing that gets us new results is… NEW ACTIONS!
Case Study: My Champion Powered Refrigeration Renovation
You don’t have to spend a lot of money or a ton of time to get a more functional space. I’m a huge fan of bins, as you can see. By following my method, you don’t have to pull five things out to find the one you want. There are all kinds of bins that work – it’s really personal preference and budget that determine which ones you get. Don’t forget to measure your space so they all fit nicely.
My Freezer (Before & After)
My Refrigerator (Before & After)
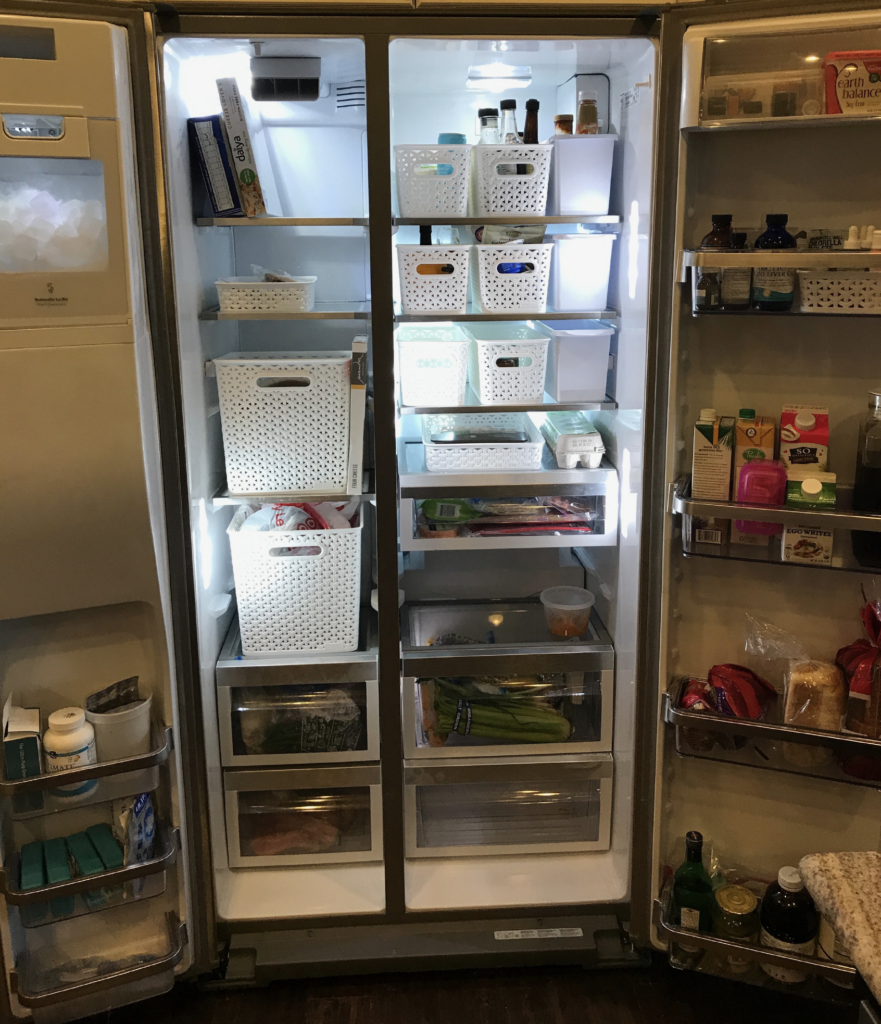
My New, Organized Refrigerator
The final product turned out great on this one. I threw away a ton of expired foods, freeing up lots of space.
Complete your own Refrigeration Renovation?
Take a picture of your new, organized refrigerator and share it with me over on Instagram!
I’d love to see what you create using these 9 simple steps on how to organize your refrigerator! Make sure you mention me @5D_Athlete!


